Thursday 27 August 2015

Painting: Kings of War - Undead: Ghouls

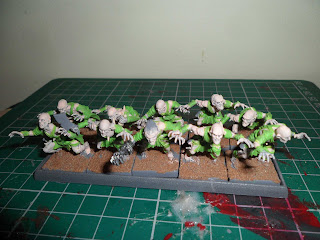
So life is still a little hectic at the moment not helped by me spraining my ankle. Despite this I have been able to finish the 10 ghouls that came in the Mhorgoth Revenge box.

Now, much like the zombies (and everything else in that box set), I was way too excited and just built everything without going through my usual review process, so like my zombie post here is a quick run through of the models before I proceed to the painting of my ghouls

Packaging:
It was part of the Mhorgoth Revenge two player starter set, so was a good box with the miniatures nicely stacked inside
The Models
These models have a great level of detail.
The models are made of a strong plastic, which can make them slightly difficult to remove from the sprue. 
On the sprue there is a nice selection of heads, arms and some extras to add/convert the models.
Building the Models
The model range come in 3 parts: torso, legs and head, so are are easy and quick to build especially as the pieces fit together nicely.
Now I have encountered two issues when building these, one was converting a hand to the hand holding the cleaver/claw; it's just small and fiddly, resulting in concerns that it will fall off at a later date. My second issue is ranking them up, the arms are in such a way that it can be difficult to rank them up nicely to a bit of shuffling is required to allow this to fit correctly.
The was little to no excess plastic or mould lines.

So as mentioned these are easy to build, so quick as a flash 10 were built (which is good as I've got 30 more!)

So onto the painting: all paints listed are from the Vallejo game range unless otherwise stated:


I started with a grey undercoat in the form of Halford Grey Primer, then based with pva and sand.
Once the sand was dry I tided up the edge of the bases so they ranked up as best they can, then painted the flesh with Pale Flesh (72.003). I like the idea of Ghouls still having an element of being human yet being degenerate at the same time.


Then I painted the cloth in Escorpena Green (72.032), as mentioned in my zombie post this will be my army colours.


Next I painted the nails & spikes with Gunmetal (72.054) and barbs/other spikes with Bonewhite (72.034)


I wanted to give the Ghouls weapons a rusted look so I used an old technique that once featured in an issue of White Dwarf (but adapted using Vallejo colours): Start with a basecoat of Dark Flesh (72.044)


Then dab on a light amount of Parasite Brown (72.044)
                         

Followed by a light dabbing of Orange Fire (72.008)


Then drybrush/highlight with Gun Metal (72.045), and there you have it, rusted weapons


Next I used Gory Red (72.011) around the nails/spikes/barbs etc to represent a soreness in the flesh and added it to the claw of the leader. Then painted the leader's hair Beasty Brown (72.043) and tidied up the flesh/cloth of all of them.


I added a liberal coat of Army Painter Dark Tone all over.


Then drybrushed the flesh with Bonewhite (72.034) and the cloth with Livery Green (72.033)


Next I painted the bases with Charred Brown (72.045), then drybrushed with Plague Brown (72.039), then Bone White (72.034) and added static grass. I finalised the painting by varnishing them all with Matt Varnish (72.520).

Once the varnished was dried I finished by adding a adhesive metal sheet to the movement tray and added magnets to there base. This allows them to be used for KoW as well as any other game that Ghouls feature in like the eagerly anticipated Dragons Rampant.

Once again I am pleased with the end result, I hope you found this helpful and in someway inspirational.

Next unit to paint will be my Skeletons...watch this blog.

Thursday 20 August 2015

Nothing to report

Well, after a week of personal/family commitments I haven't been able to do any painting or building so I have nothing to write about but hopefully next week I'll publish a double post....

...I have however bought some new minis....

Friday 14 August 2015

Painting: Kings of War - Undead: Zombies

I've recently been working on a regiment of 15 Mantic zombies for my Kings of War Undead army and thought I would document it below.

As per my recent posts I'm all about getting multiple uses out of the same models, so although the title is Kings of War, these could of course be used for any zombie game.

Those of you that have read my blog before will know that I usually post up a "miniature" blog first where I review the building of the models; unfortunately I got a bit excited with these zombies (and all the undead I recently purchased) and built them before reviewing them so I'll do a quick review as part of this painting walkthrough.

Packaging:
It was part of the Mhorgoth Revenge two player starter set, so was a good box with the miniatures nicely stacked inside
The Models
These models have a great level of detail, and suitably gory.
The models are made of a strong plastic, which can make them slightly difficult to remove from the sprue. 
On the sprue there is a nice selection of heads, arms and some extras to bulk out the unit.
Building the Models
The model range from 3 parts to 4 parts, all are easy to put together and pieces fit together nicely. The only issue I experienced is the bodies rising out of the ground, where I couldn't get the torso so fit snugly.
The was little excess plastic or mould lines.

There we have it 15 zombies built in no time at all. Now onto painting them...

...it's worth noting that paints listed are from the Vallejo Game colour range unless otherwise stated...


As you can see I started with undercoating in Halfords Grey Primer: I decided to use grey as it's still dark but not too dark that detail is obscured.


Next I painted the areas of skin with Dead Flesh (72.035). Painting lightly over the areas in quick succession, in almost a drybrush fashion (but with more paint on the brush), this way holes, and creases were dark. I would recommend using an old brush as this process can ruin a brush. I would also advise to do 5 maximum at a time before cleaning the brush and continuing.


Once the flesh was dry I painted the cloth in Escorpena Green (72.032) .  I used this colour as I wanted something distinctive and I feel that Escorpena Green really jumps out. This is going to be my army colour


Next was one of my favourite stages; painting the wounds. Using Gory Red (72.011) I painted all the wide open wounds. I even painted over the bits of exposed bone and brain . This almost instantly adds depth and gives them a gory element.

Now I did learn a lesson when painting these: when squeezing a Vallejo paint pot, if the paint is coming out slowly don't keep squeezing instead stop and unplug the blockage otherwise the lid will pop off and red paint will explode everywhere, making your paint area and hands look like a scene from a horror film (quite apt considering the subject)


Although not clear in this picture, I painted the body parts that some zombies were carrying. Deciding to go with Pale Flesh (72.003) to give them a suitably drained look.


Using Bone white (72.034) I then picked out the teeth and all the areas of exposed bone, trying not to loose too much of red. 


Braaaaaaaaiiiiins! were painted with Squid Pink (72.013). From this picture you can see where I've picked out the exposed skull with the bone white as mention above.


Next I tidied up the models, going over any areas that needed it. Including painting the zombies hair Cold Grey (72.050) and adding Gory Red to the carried body parts.
Then onto my favourite stage; giving everything a covering with Army Painter Dark Tone.


Once the Dark Tone was dry I mixed 50% Dead Flesh with 50% Bone White and dry brushed the flesh areas, including the carried body parts. I feel this has added depth and really made the models "pop"
I also drybrushed the cloth with Livery Green (72.033) followed by varnishing the model using Matt Varnish (70.520)


Once the varnish had dried I covered the bases with sand which, once set, I painted with Charred Brown (72.045), then drybrushed with Plague Brown (72.039), then Bone White (72.034) and finally I added static grass.
I then did the same process for the movement tray.

Once the bases were dry I added a adhesive metal sheet to the movement tray and adhesive magnetic squares (cut to size) to the bases of the zombies. These have a strong magnetic bond so will allow the regiment to be stored with ease as well as helping with moving around the battlefield and by magnetising each model I can use these individually for other systems as mentioned at the start.


I'm rather pleased with the end result, and as this is my first undead unit, it sets the bar for the rest. I look forward to finishing the remaining 5 (built after I painted these using the spare legs and spinal columns, which goes against everything I believe for zombies that they need a brain to function, but makes the regiment upto 20 as required) and to fielding them very soon.

I hope you found this helpful and in someway inspirational.


Thursday 6 August 2015

Miniatures: Ancient British warriors


Not being content with the bulging pile of plastic and metal I already have I decided to invest in some Ancient British Warriors by Warlord Games.


I did this for several reasons:
1) Warlord Games was running a promotion where if you purchased a rulebook you got a free box of models. So as I already have Pike & Shotte and Black Powder it made sense to buy Hail Caesar, that and a friend of mine has just bought the Roman legion starter army.
2) I was looking for some models to represent serfs in Lion Rampant
3) I'm a wargamer and thus I don't need a reason to surround myself in such things (although my wife may argue on the contrary.)

Before I dive headlong into my review I just wanted to point out something that my eagle eye readers/followers may have already spotted. I haven't specified a game system in my post title like I normally do. This because I feel that these models are perfect for some many game systems I didn't want to pigeon hole them. Like I mentioned above I'll be using them for Lion Rampant, I'll also be using them in Hail Caesar (Albeit when I get a lot more to support them). But they can be used for Kingdom of Men for Kings of War, Rabble for Pike & Shotte, even as survivors in a post apocalypse game like Across the Dead Earth (although you wouldn't need 40) and so on.


The Packaging:
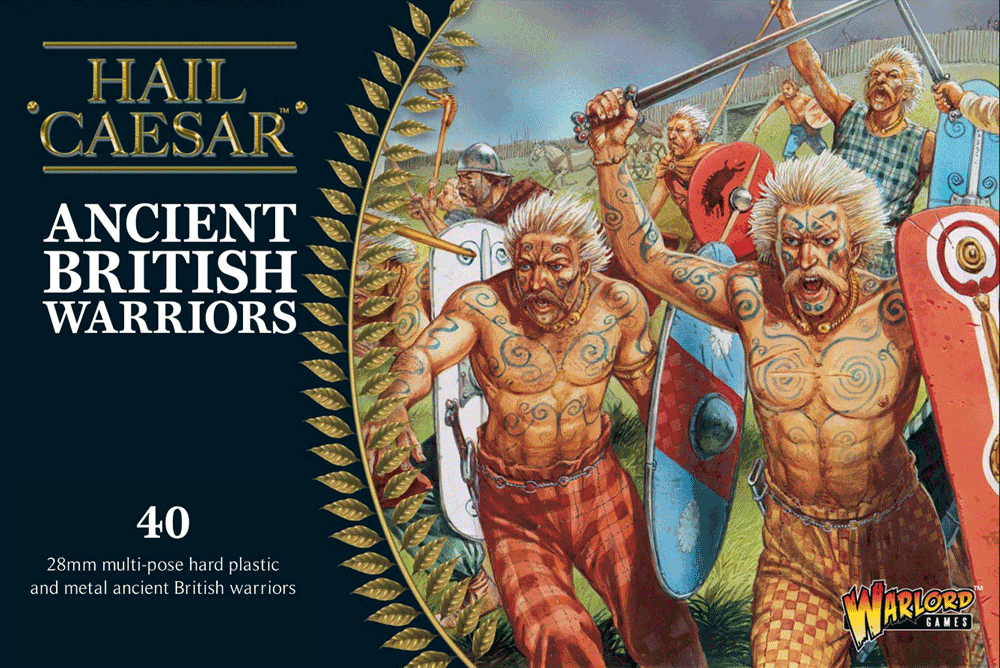
A card box depicting an artists impression of Ancient Britons on the front and  a photo of the contents built and painted on the back, with a small description about the ancient Britons and their encounters.

The card is well made and sturdy and doesn't come apart or bend easily despite have metal components inside.

Inside the box is 4 plastic sprues, 1 shield transfer sheet and a clip-bag containing metal heads, shields and the upper half of a chieftain

I know in this section I am covering what's in the box, but I thought that it's worth outlining that no bases are supplied.

The Models


As above, there are 4 plastic sprues, each sprue contains enough to make 10 ancient Britons, for a total of 40 ancient Briton/Celtic warriors.

Most warriors are made up of 4 parts; torso, legs, head and shield. However some consist of 5 parts; torso, legs, head, weapon and shield

3 sprues are "normal" with just the warriors and some extra parts and 1 sprue is the command sprue; so in place of the heads it contains banner poles/totems and a horn. So be sure to keep the heads from the other 3 sprues to hand.

The plastic models are highly detailed, which, I feel, adds to their versatility.


This box contains a bag of metal parts consisting of shields, heads, banner pole/totem, horn and the upper torso of a chieftain.

I was a little disappointed with these metal parts: I personally don't feel that the metal heads are as detailed as the plastic and they look slightly larger. The chieftain also isn't as detailed as the plastic warriors, and needs to be stuck to plastic legs which is concerning. The banner pole/totem wasn't straight so couldn't be used.

That said the horn was fine and is a better size than the plastic one and the shields also seem okay.

Overall the quality of the detail on the plastic models is much better than that of the metal. Thankfully you don't have to use the metal parts if you don't want to (okay you do if you want most of your warriors to have shields)

Building the models


Typically with models from Warlord games no instructions are included and these are no exception. Thankfully, and unlike the Pike & Shotte infantry, none is required. It's easy to see which torso match which legs and there is enough variety of bodies and heads. But it is worth noting that although all torsos can go on all legs, only specific ones should (like chainmail torso and legs with chainmail waist)

These models were easy to remove from the sprue and only required minimal of tidying. Which was a refreshing change after the recent models I've built where the sprues have been made by Renedra. I believe that the minimal tidying required was only because I use a cheap pair of clippers and scalpel, whereas decent clippers may not leave any excess plastic behind.

There is little to no mould lines, and even those I only found on the weapons.

Once removed from the sprue and tidied (if required) the parts fit together easily; the legs are nicely recessed in the waist to allow the torso to be added and it even allows some room for the torso to be placed in alternative positions. The neck is flat and as is the bottom of the heads, so they also go together without any issues, with enough room to turn the head in any suitable direction. The only issue are the models that require weapons (2 per sprue), the hole in the hands is just a fraction too small (or the weapons are a fraction too big) and you'll need to adjust the hand slightly. You can add the weapons without the adjustment but it takes forcing and of course could lead to breakage (thankfully non of mine broke or received stress damage.

Within no time at all 40 models have been built; you'll notice that I've not added the shields yet. This is because I want to paint them before adding the shields so no area is missed/difficult to reach. 
I then mounted them on Renedra 20mm bases; this gives them the uniform look and fits with the rest of my Lion Rampant force.


Now I need to think of how I'm going to paint them....in the mean time I have made some suggestions of possible Lion Rampant units below.


Fierce Foot

Men-at-Arms inc leader

Serfs