Thursday, 6 August 2015

Miniatures: Ancient British warriors


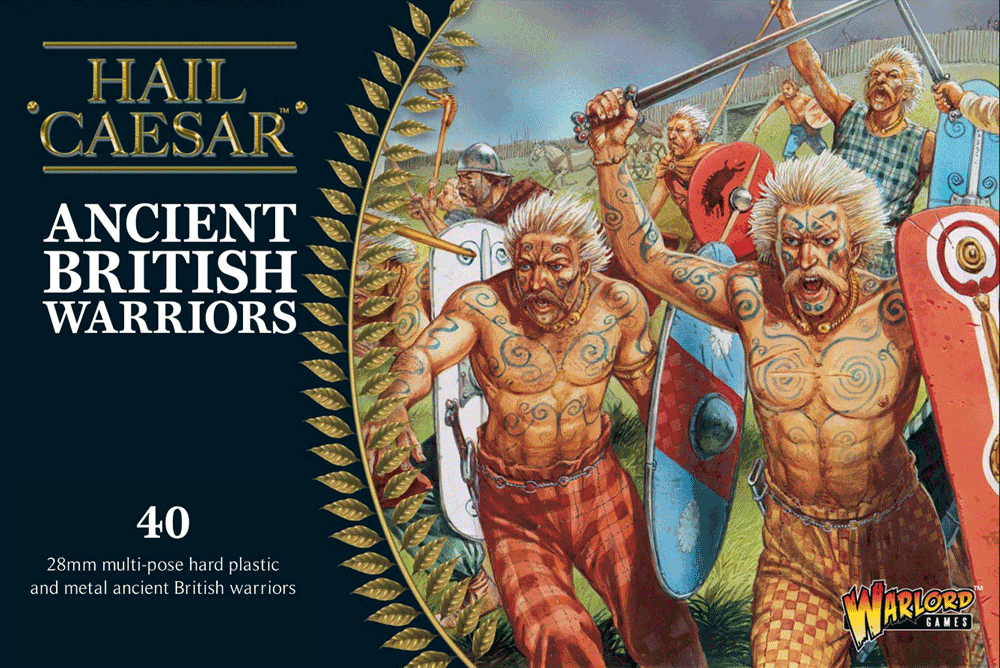
Not being content with the bulging pile of plastic and metal I already have I decided to invest in some Ancient British Warriors by Warlord Games.


I did this for several reasons:
1) Warlord Games was running a promotion where if you purchased a rulebook you got a free box of models. So as I already have Pike & Shotte and Black Powder it made sense to buy Hail Caesar, that and a friend of mine has just bought the Roman legion starter army.
2) I was looking for some models to represent serfs in Lion Rampant
3) I'm a wargamer and thus I don't need a reason to surround myself in such things (although my wife may argue on the contrary.)

Before I dive headlong into my review I just wanted to point out something that my eagle eye readers/followers may have already spotted. I haven't specified a game system in my post title like I normally do. This because I feel that these models are perfect for some many game systems I didn't want to pigeon hole them. Like I mentioned above I'll be using them for Lion Rampant, I'll also be using them in Hail Caesar (Albeit when I get a lot more to support them). But they can be used for Kingdom of Men for Kings of War, Rabble for Pike & Shotte, even as survivors in a post apocalypse game like Across the Dead Earth (although you wouldn't need 40) and so on.


The Packaging:
A card box depicting an artists impression of Ancient Britons on the front and  a photo of the contents built and painted on the back, with a small description about the ancient Britons and their encounters.

The card is well made and sturdy and doesn't come apart or bend easily despite have metal components inside.

Inside the box is 4 plastic sprues, 1 shield transfer sheet and a clip-bag containing metal heads, shields and the upper half of a chieftain

I know in this section I am covering what's in the box, but I thought that it's worth outlining that no bases are supplied.

The Models


As above, there are 4 plastic sprues, each sprue contains enough to make 10 ancient Britons, for a total of 40 ancient Briton/Celtic warriors.

Most warriors are made up of 4 parts; torso, legs, head and shield. However some consist of 5 parts; torso, legs, head, weapon and shield

3 sprues are "normal" with just the warriors and some extra parts and 1 sprue is the command sprue; so in place of the heads it contains banner poles/totems and a horn. So be sure to keep the heads from the other 3 sprues to hand.

The plastic models are highly detailed, which, I feel, adds to their versatility.


This box contains a bag of metal parts consisting of shields, heads, banner pole/totem, horn and the upper torso of a chieftain.

I was a little disappointed with these metal parts: I personally don't feel that the metal heads are as detailed as the plastic and they look slightly larger. The chieftain also isn't as detailed as the plastic warriors, and needs to be stuck to plastic legs which is concerning. The banner pole/totem wasn't straight so couldn't be used.

That said the horn was fine and is a better size than the plastic one and the shields also seem okay.

Overall the quality of the detail on the plastic models is much better than that of the metal. Thankfully you don't have to use the metal parts if you don't want to (okay you do if you want most of your warriors to have shields)

Building the models


Typically with models from Warlord games no instructions are included and these are no exception. Thankfully, and unlike the Pike & Shotte infantry, none is required. It's easy to see which torso match which legs and there is enough variety of bodies and heads. But it is worth noting that although all torsos can go on all legs, only specific ones should (like chainmail torso and legs with chainmail waist)

These models were easy to remove from the sprue and only required minimal of tidying. Which was a refreshing change after the recent models I've built where the sprues have been made by Renedra. I believe that the minimal tidying required was only because I use a cheap pair of clippers and scalpel, whereas decent clippers may not leave any excess plastic behind.

There is little to no mould lines, and even those I only found on the weapons.

Once removed from the sprue and tidied (if required) the parts fit together easily; the legs are nicely recessed in the waist to allow the torso to be added and it even allows some room for the torso to be placed in alternative positions. The neck is flat and as is the bottom of the heads, so they also go together without any issues, with enough room to turn the head in any suitable direction. The only issue are the models that require weapons (2 per sprue), the hole in the hands is just a fraction too small (or the weapons are a fraction too big) and you'll need to adjust the hand slightly. You can add the weapons without the adjustment but it takes forcing and of course could lead to breakage (thankfully non of mine broke or received stress damage.

Within no time at all 40 models have been built; you'll notice that I've not added the shields yet. This is because I want to paint them before adding the shields so no area is missed/difficult to reach. 
I then mounted them on Renedra 20mm bases; this gives them the uniform look and fits with the rest of my Lion Rampant force.


Now I need to think of how I'm going to paint them....in the mean time I have made some suggestions of possible Lion Rampant units below.


Fierce Foot

Men-at-Arms inc leader

Serfs


Thursday, 30 July 2015

Miniatures: Lion Rampant - Archers and Foot Sergeants


This week I thought I'd build my War of the Roses box set by Perry Miniatures. 

I'll be mainly using these for Lion Rampant but these can be used for a whole host of games set around the medieval period,  as such I'll also be using them as a Kingdom of Men force for Kings of War.

The packaging:
As per the stock photo below you get a card box with a great picture. As well as an inlay sheet outlining the war of the roses, colours and heraldry used during the war and a basic how to guide, including what armour is what - Warlord games take note!

The box contains 3 sprues of 12 troops (36) and 2 command sprues of 2 (4) (picture of individual sprues below), resulting in a total of 40 models for the rrp of £20, which I feel is great value for money, especially as you can get it cheaper elsewhere online.


The box also contains the bases shown below; this is useful for games where multi basing is required (Hail Caesar, Kings of War etc) however this doesn't work for Lion Rampant, so I won't be using these.
The Models:
The models have a great level of detail and there doesn't appear to be any molding issue. The command sprue also contains a range of extras like arrows, quivers, swords etc.

There's a great range of arms, some are single piece, some are two pieces (left and right) and then there's multi part arms!! now that drives me mad! I'll cover that in "building the model"

Removing these models from the sprue was a little difficult, as the plastic is so hard that a lot of pressure had to be applied with my craft knife. Why didn't you use clippers? I hear you cry well this is because I don't have thin long nose ones, just short ones so I was unable to easily get under the base.

Building the Models
As mentioned above you can build 40 models.
With 12 models on a sprue I assumed that they would work as either billman or archers, but this isn't the case, it seems that some of the models are specifically archers and the others billmen, I've tried to mix them up but the positioning of the bodies just does't work.

Once removed from the sprue, which was actually quite difficult as the plastic is very firm, and cleaned up, the parts go on the model nicely, fitting snugly with little to no gaps or strange angles. Except for Multi...part...arms!! why...why do the gods taunt me so! I find them so difficult to put together, trying to align the arm with the hand on the pole while positioning the other arm socket is a nightmare, but I prevailed and was successful in my unholy fight.

When fully built I glued them individually to 20mm bases; I bought these bases from Warlord games and I felt they worked better than GW bases, as I wanted a lower/flatter base.

 Out of the 40 I built with Lion Rampant in mind:
 12 billmen, which I will use as foot sergeants

24 archers with command, the unit with command will probably be my elite archers

4 command (Standard, 2x Hero/Leader/General (call it what you want) & musician), these don't really have a use in Lion Rampant so I may use these as Men-a-arms (with the addition of two more models of course)

Command at alternative angle
I would happily buy this box again and build the command as fully fledged Men-at-arms, as there are some "troops" that are wearing full plate so could easily be put together with the command sprue to make Men-at-arms. It would also be just as easy to make less archers and more foot Sargeants.

Overall I'm very pleased with how these look and I look forward to painting them up and fielding them for Lion Rampant.

Thursday, 23 July 2015

Painting: Infinity: Jurisdictional Command of Corregidor


Last week I promised I would do two posts this week to compensate for the lack of post last week so here is my second.

In this post I will talk about how I paint my Jurisdictional Command of Corregidor, Now i don't claim to be a pro-painter but I'm pleased with my results and I hope you the reader will find it helpful (as well as documenting my process for my own reference for when I paint other models)

I start with undercoating in Black, using Halford Black primer

Once the undercoat is dry I paint all the cloth/non armour with GW Macharius Solar Orange, I then use Vallejo Hot Orange. When the orange is dry I apply AP strong tone over it all. Then when the AP has dried I drybrush with Vallejo Orange fire and that's the cloth done.

I leave the armour and boots as black, touching up in places the undercoat didn't reach, and any areas where the orange bled onto it. I then drybrush with Vallejo Stone Grey.

For the combi rifle/pistol/knife I paint in Vallejo Gunmetal, then wash with GW Nuln Oil. Once the ink has dried I paint specific areas (handles, raised areas, blade of knife) in Vallejo Chainmail and then wash the entire weapon in GW Nuln Oil again to really darken the dark areas. Once that has dried I apply Vallejo Silver on the handle.

The face are painted using an old GW method I've used for years, For a Caucasian skin tone I start with Dark flesh all over, then tanned flesh with a consistent but light coat, the dwarf flesh carefully applied not to fill the intentionally dark areas (eyes, mouth etc) then I highlight with elf flesh. For darker/African skin I start the same way (Dark flesh), then I apply Beasty Brown and finally drybrush with Leather Brown.

Hair is so varied that I just use different browns, blues, yellows etc. followed up with a wash of AP light or strong tone..

The belts and pouches are painted with Vallejo Leather brown

Once all the painting has been done and I've touched up any required areas I then apply Vallejo Matt varnish, now this starts white so can be a little frightening to apply to your newly painted miniature but it dries clear so there's nothing to worry about.

To Summarise
Armour
Leave black
Drybrush with Cold Grey (72.050)

Cloth
Macharius Solar Orange (GW)
Hot Orange (72.009)
AP Strong tone
Highlight/drybrush with Orange Fire (72.008)

Faces:
Dark flesh (72.044)
Tan  (72.066)
Dwarf flesh (72.041)
highlight/drybrush with GW Elf flesh
or
Dark Flesh (72.044)
Beasty Brown (72.043)
highlight/drybrush with leather brown (72.040)

Hair
Any colour with AP light or strong tone used afterwards.

Belt & pouches
Leather brown (72.040)

Combi Rifle
Gunmetal (72.054)
Nuln Oil (GW)
Chainmail Silver (72.053) raised areas and handle
Nuln Oil (GW) all over
Silver (72.052)

Vallejo Matt Varnish (70.520)

The above is my method for any general combi rifle wielding Corregidor Nomad.

For special weapons/special troop types I like to try to add something else to make them stand out;for example:
I paint my sniper rifles in Cold Grey (72.050)  and wash in black ink and dry brush with a stonewall grey (72.049).
My algualcile rocket launcher was painted in Cayman green (72.067)  with some parts in gunmetal (72.054) and then washed in black ink.
My alguacile HMG was painted as per the combi rifle but then a gloss varnish (70.510) was applied to make it stand out more.
A shoulder of my alguacile medic was painted white with a red cross painted on.
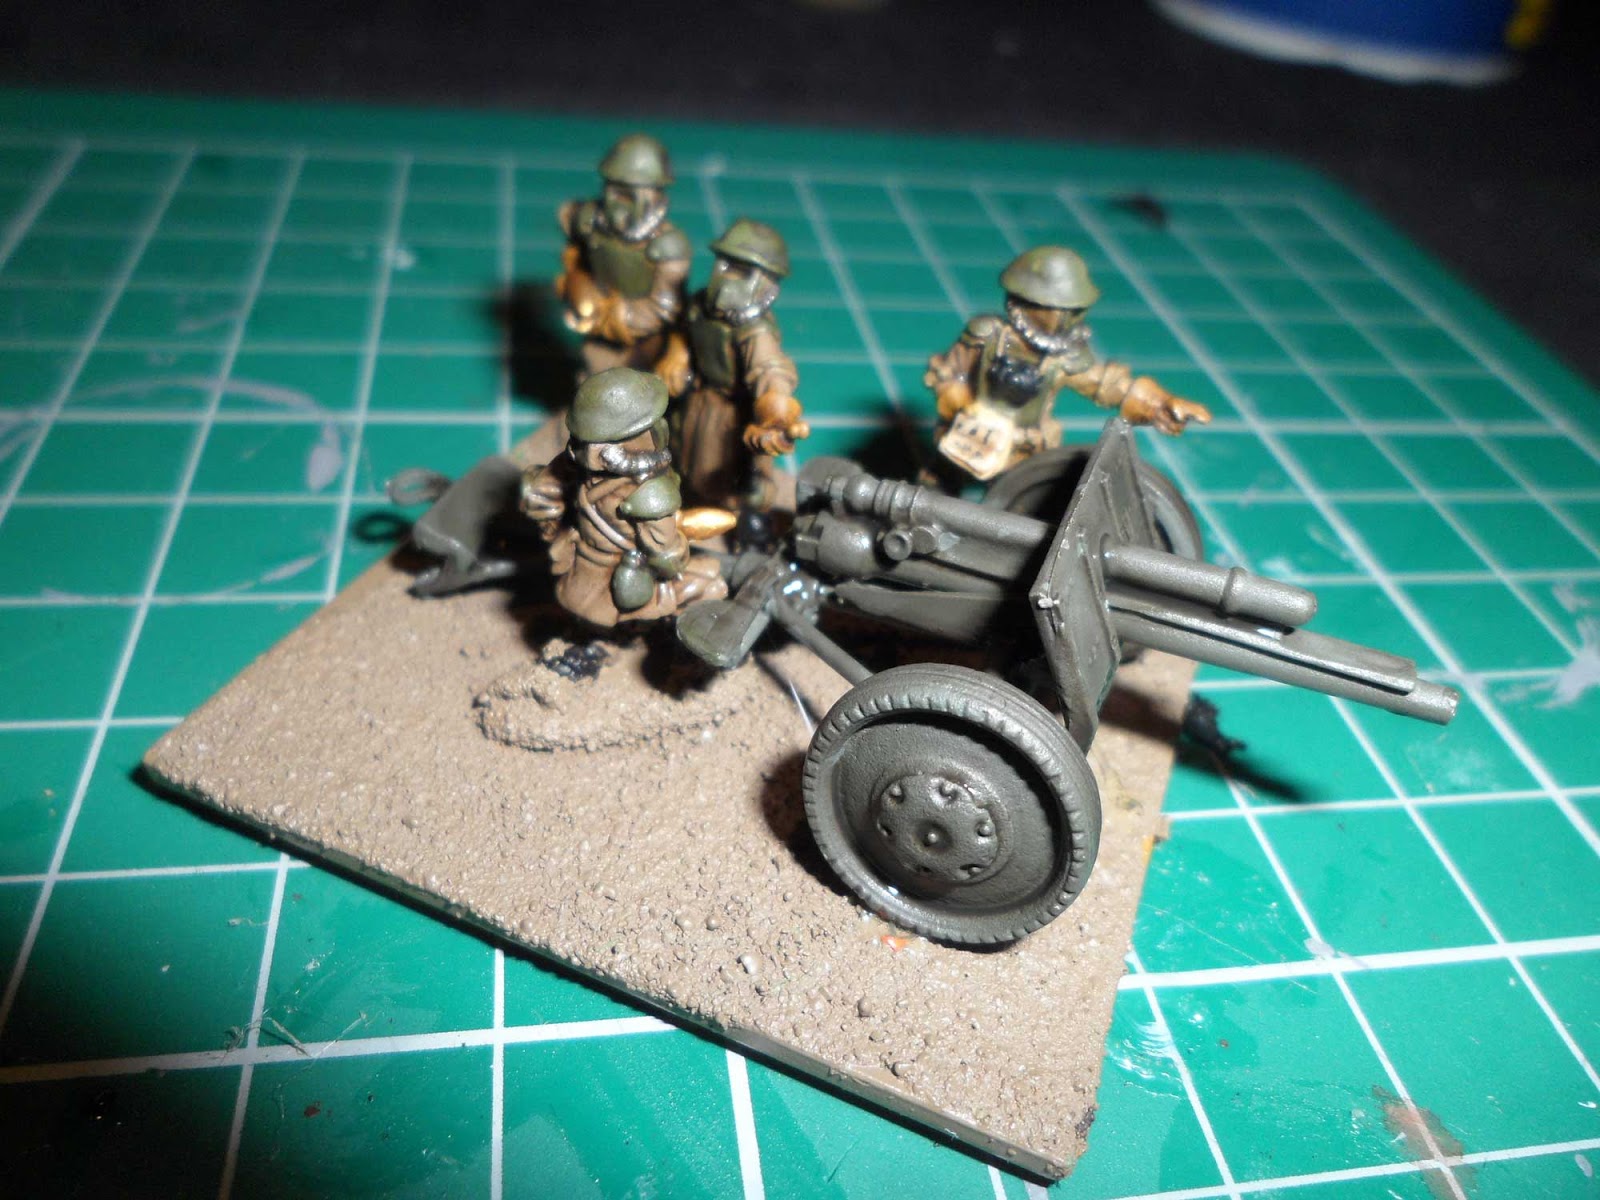
Not the greatest pic...


Painting: All Quiet on the Martin Front - BEF Field Guns

After a week of wheeling and dealing (this has lead to the purchasing of more models and now my "to do" list has increased!) I was able sit down and do some painting, which felt good!

I decided to paint the BEF field guns I built the other week. Now I already have some BEF infantry so I knew which colour scheme I would follow.

What I didn't mention in my post about building the BEF field guns is that I didn't glue the guns down to the base and I positioned the crew so I could remove the guns. This way the crew and guns could be undercoated separately. 

With the guns removed I coated the base with PVA glue and dipped them in sand. Once dried I sprayed the crew and base with Warlord Bolt Action spray primer: British Uniform Brown; this covers the crew uniform as well a nice muddy base.

I then, and in a separate location, sprayed the field guns with Halfords camouflage spray paint green. I like this paint as it's cheap and I feel that it works well for military equipment.


With the undercoat dried I started with the boots painting them in Abaddon black, as I was painting I noticed that some of the boots got covered with sand during the basing and as I went to remove it I realised it actually looked quite good. It looked as though they were standing in a quagmire so I just painted bit of the boots that were showing.

I then painted all the armour and helmets with Cayman Green. followed by the belts and webbing in khaki, Then I painted the gas mask ventilation tubes in gunmetal metal and the artillery shells in glorious gold. Followed by painting the gloves in Leather Brown.

Next I concentrated on the commander painting his binoculars negro black, now I used this black instead of Abaddon Black because Negro Black is more glossy so I thought it would make the binoculars stand out more. I then painted the pages of his book Plague brown, followed by a light coat of Bonewhite. Once dry I did small scribbles of black to represent writing. Next was the straps of the binoculars which I did in leather brown.

Once the basics had been applied everywhere I touched up any areas that need it with the relevant colour, including the guns.
Before applying AP strong tone

Once all the paint was dry and I was happy with it I then applied magic in a bottle, otherwise known as Army Painter: Strong Tone. I get a good amount on the brush and apply it quite thickly all over. This was applied to both the crew and gun.
After applying AP strong tone

When the AP strong tone dried I applied Matt varnish, now this starts white so can be a little frightening to apply to your newly painted miniature but it dries clear so there's nothing to worry about.

Finally I dabbed glue on the gun and glued it into position.

All in all, these took me two hours (not including the undercoating) to paint. Not bad going and I'm very pleased with the results. Granted not pro-painted but certainly to a good satisfactory condition.

To Summarise - (Paints are Vallejo game colour range unless otherwise listed)
Boots
Abaddon black - GW

Helmets, Armour plating, Canteen, Field gun touch ups
Cayman green - 72.067

Belts and webbing
Khaki - 72.061

Gas mask ventilation tubes
Gunmetal metal - 72.054

Artillery Shells
Glorious gold -.72.056

Gloves and binocular strap
Leather brown - 72.04

Binoculars, writing in the book
Negro black - 72.051

Book pages
Plague brown - 72.039
then once dry a light coat of Bonewhite - 72.034

Clothing - touch up
British Battle Dress - FoW paint set

Varnish with Matt Varnish - 70.520


Wednesday, 15 July 2015

Nothing to report


This past week I've been too busy sorting through my model collection and selling it to have done any painting or building.

Hopefully normal service will resume next week. I'll might even try for a bumper edition of two entries....

Cushty!

Thursday, 9 July 2015

Miniatures: All Quiet on the Martian Front - BEF Field Guns


So with all the excitement/rage flying about the internet regarding Warhammer: Age of Sigmar I thought it would be a good idea to review the Sigmarine I got with the latest copy of White Dwarf...


....just kidding as per the title I thought I would in-part my personal views upon the world once more by reviewing the British Expedition Force field guns for All quiet on the Martian front.

So like my Martian's, I thought I would expand my BEF - it has nothing to do with being British, honest! - it's totally to do with getting a fair amount of US with the KS...honest....really! stop looking at me like that!

Lets give it the once over...

The Packaging:

Like I mentioned in my Drone review the packaging is huge! Could this handbag sized blister be reduced; possibly not for these models, I will explain why later.

The Models:


These models consist of 10 parts, which, including the squad commander, comes to 31 fiddly parts.

The models have a good level of detail, especially the crew.

Now these models had so much flash! With the pile of excess metal I had at the end I could have smelted it down and made another crew or two (and that's from the bits that didn't ping across the room).

Some bits of the flash were easier to remove than others. The big issue being how soft this metal is, meaning you can't push too hard on parts of the gun carriage otherwise it starts to bend. Which is why I don't think smaller packaging will work as I believe the pieces will bend, warp and possibly even break.

Building the model:

Like most models from Alien Dungeon for the All quiet on the Martian Front range this doesn't come with instructions, now considering these models consist of 7 (minus the crew) small flimsy pieces it would be very difficult to build these, especially as it transpires that pieces don't go where you might think they do.

However help is at hand as a very helpful member of the forum has created this "How to thread", without it building these models would be almost impossible:
http://robotpeanutstudios.proboards.com/thread/1275/field-gun-assembly

With the webpage open, glue in hand and cold water nearby I set about putting these models together. It was a breeze thanks to the guide, I was able create a production line following the simple process of add glue, add water, leave to dry move on. In no time at all I had built all three. The only difficulty I encountered was adding the "crew seats" (the smallest piece with two lips either side), and that was because the gap which goes over the main shaft was too small, however thanks to the light weight metal I was able to widen the gap to allow me to apply it and when pushing on it sets back to its original position.

Once built, these are lovely models and I now very much look forward to painting these in the near future, so watch this space!


Thursday, 2 July 2015

Miniatures: All Quiet on the Martian Front - Martian Scorpion drones


Back in 2013 I invested in a kickstarter (KS) called "All Quiet on the Martian Front" by Alien Dungeon. For those of you unfamiliar with this game it's essentially a 15mm (although the models are more 20mm) War of the Worlds II.

Its circa 1910 and the Martians are back invading the earth  after learning from the first invasion but this time they have started in America and built up their forces before attacking.

So after receiving a fair sized force for both my Humans and Martians as part of the KS I decided it was time to expand and bought some Scorpion Drones.

So lets give it a review:
The packaging:

Just look at that monster of a blister!! As a comparison I've put it next to a Dropzone Commander (10mm scale) Blister (Left) and an Infinity (28mm scale) blister (Right) This must be costing Alien Dungeon a fortune in production costs. Now they probably have a good reason for it; other than standing out amongst a sea of other blisters I have no idea what it would be...

The models:
These drones consist of 6 parts;

  • 3 legs (keeping with the tripod design)
  • Scorpion tail
  • Waist
  • Drone body

The flash wasn't too bad; a few big bits on the waist, then little bits here and there.

The metal is very light weight, and can be moved very easy. As you'll be able to see in my photo of the built drones that I tried to move the tail of one of them into a different position but the tip snapped off, so be careful.

Overall nice and easy to clean up

Building the model:

Now the first of these little blighters was a pain to build! Trying to glue the legs to the waist was a nightmare, but it's clearly where the Martian drones get their first taste for human flesh as the enslaved human builder gets welded to the drone parts during its construction.

It took at least 10 minutes to build the first one; trying all sorts of tricks to speed up the drying of the superglue. So after replacing several layers of skin on my fingers with super glue, and resting from a dull ache of holding bits of the model in place some advice drifted across my brain like a windows 95 screensaver - use cold water with the glue.

With this thought in mind I started on the second model applying the glue in the cavity on the waist where the leg was going to go, I then dipped the leg in cold water and applied. BINGO! the glue dried in seconds! forming a firm hold. Within the next 10 minutes I had built the remaining two!.

There you have it - 3 drones ready to join my Martian forces!